By Paul Groves (Dr. Grovenstein) and Dean Papadakis (Dr. Papadakenstein)
South Pasadena High School
1401 Fremont Avenue, South Pasadena, CA 91030
email: pgroves@aol.com
The combustion of gases, liquids, and solids and speeds of reaction. The reactions are chosen to be effectively viewed in the dark.
Notes about the "patter" are included for some of the demonstrations. PRACTICE EVERYTHING BEFORE YOU PRESENT TO THE STUDENTS! You will be surprised at what doesn't work.
- The room is dark with special lighting over the front demonstration table…
- a little light that spills onto part of the chalk board…
- and 4-foot fluorescent UV lights on the tops of each of the three lab tables (the lights are placed in shop-light fixtures facing the ceiling above eye level so that students are not looking directly into the lights).
- There is also a UV light pointing at the chalk board.
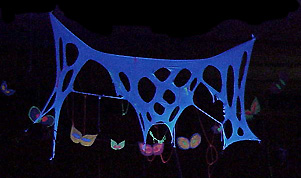
- The room is decorated with fluorescent objects that glow in the UV lights including old white t-shirts that have holes in them and have been stretched out with strings to look something like giant cob webs, index card eyes that have been colored with fluorescent crayons, and silly string (it is fluorescent). There is a Happy Halloween sign above the chalk board painted with fluorescent bingo daubers.
- The sink is half-filled with hot water. As the students enter, we play Bach's Toccata and Fugue in D minor (Phantom of the Opera movie music) and dump finely crushed dry ice into the sink.
- For safety, we also have hung strings of Halloween lights along the lab tables because we have visitors all day who need to navigate their way through the unfamiliar surroundings.
- Note: as soon as the last class is over the day before Halloween, the chemistry teachers meet in the chemistry room along with a few students who took chemistry the year before. We can get the room completely decorated in about 3 hours. At first, it took about 6-7 hours.
My name is Dr. Grovenstein and I would like to welcome you to my laboratory. Today, I would like to talk to you about one of my favorite topics… BURNING! (I love burning…)
Of course, Dr. G. puts on his goggles at this point!
--- GASES THAT BURN ---
1--A Bunsen burner with a long Tygon tube is shown
This is a Bunsen BURNER! [Dr. G. fondles burner] (I love burning…)
[before lighting, Dr. G. gets students to tell him what gases go into the burner and what is needed for something to burn… a fuel… an oxidizer (usually oxygen)… and heat…] [Dr. G. lights the burner]
2 -- Equation on the board

We can write an equation for this reaction… called combustion [at this point, students usually groan because they realize this might be a lecture rather than a show] [Dr. G. writes CH4 on the board with special fluorescent lecture chalk… a little difficult to find, but the students go… Ooohhh!… it is worth looking for!]
[I found it at Shannon Luminescent Products in Santa Ana, CA… $5.00 per stick a few years ago…--see references.]
[Dr. G. gets students to help finish the equation CH4 + O2 --> CO2 + H2O ... then we balance the equation.]
3 -- Show that water is really formed.
You may be surprised that WATER is formed during burning. Look at this spot on the chalk board [students are directed to look at the spot on the chalk board that is lit dimly by regular lights. Dr. G. gets close to the board and exhales long in one spot. The moisture makes the board a little darker in one spot… this may need to be repeated until students can see the spot.] [Dr. G. gets the students to tell him that the board is darker because of the moisture from his breath.] [Dr. G. passes the Bunsen burner flame over the chalk board and a dark streak forms and goes away… water that condenses from the burner flame]
So I don't want to hear any of you saying that you don't believe that water is formed during combustion.
4 -- Methane Bubbles are made and ignited by a candle on a VERY long stick.

This Bunsen burner is nice… but we can make methane gas burn in a more fun way… methane BUBBLES! I will need a volunteer… here are your safety goggles… I will use this funnel connected with a tube to the gas jet to make bubbles. [Dr. G. gets students to tell him that CH4 will be lighter than either the N2 or O2 in the air… so the bubbles will float.] You (the assistant) will hold this candle on a long stick (about 2 meters long) above my head… no… higher… no… my hair is short enough already… higher… OK… [Dr. G. turns on the gas and uses the funnel or a 'bubble trumpet" to make methane bubbles… the student lights the bubbles near the ceiling… it takes a couple of tries and the smell is terrible, but the flame ball is spectacular…] [burn a couple of bubbles and then move on… leave the students wanting more]
I love burning! [To the assistant] Thank you for your help.
5 -- Hydrogen gas is generated
with Al foil and 4 M NaOH in a large test tube and ignited with a burning splint. Here is another gas that BURNS, hydrogen gas, (we do the burning-splint test in our first lab). [Fairly impressive "pop"] Let's try it a little differently!6 -- Helium and Hydrogen Balloons
[Dr. G. produces large (7" balloons) tied to the two ends of a meter stick.]
Igor set these balloons up for me... two gases that float... hydrogen and helium! They are labeled... oops... Igor forgot to label them!!! How can we figure out which is which??? [Students invariably say to light them and see which burns…] Right!… We can BURN them… I love burning!
[Dr. G. uses the candle on a long stick.]
[At this point, Dr. G. instructs the students that the best way to prepare for an explosion is NOT to put your fingers in your ear... since the shock wave is what can do damage... putting your fingers in your ears simply allows your FINGERS to push air against your ear drums… Cup your hands in front of your ears to DEFLECT the shock wave…]
[Dr. G. color codes the balloons so HE can tell which one is which... he always ignites the He balloon first... getting the students to tell him which one to do… since students will say do both, he can still do whichever one he want.]
[Dr. G. ignites the two balloons... BUT just as he is getting close to the balloon... he stops to ask:
--what will happen if this balloon is He (it will simply pop)
he stops again
--what will happen if this is hydrogen? (it will explode)
he stops once more
--what FORMS when the hydrogen burns? (water)
he stops ONE MORE TIME…
--"I'm really going to do it this time…"]
[The helium pops… so the students are REALLY ready for the hydrogen balloon…
NOTE: Do NOT pop a hydrogen/oxygen mixture balloon inside… the shockwave is very strong. Also… it is a VERY GOOD IDEA to let the other teachers know that you will be exploding balloons each period so they are not surprised…]
7 -- Mr. Ring's Camp Stove

This is the standard paint can with a hole in the top and side near the bottom demonstration. This year we tried using Pringles cans... they burned quicker and kept the presentation moving... but they were not loud... (maybe a GOOD thing).
(The biology teacher is a big camper… so we call this his camp stove and use a "patter" that he loves to camp and is kind of cheap… so he brings in these paint cans with two stoppers in the holes and fills them with gas from the gas jets. He seals the cans and takes them to the mountains!)
[After the stoppers are removed and the "camp stove" is lit, students invariably ask how long will it last… so we say… let's see… of course the whole thing explodes when the flame dips into the can…]
What did we way we need for burning… a fuel… (the methane) and oxidizer (oxygen in the air that has been replacing the methane as it burns at the top)… and heat… provided by the flame that duck inside… An explosion is caused by VERY FAST combustion… [Dr. G. gets the students to tell him that the gas inside the can expands quickly when the burning takes place… boom.]
[Dr. G. explains that Mr. Ring does NOT really use these paint cans as a camp stove… just in case they do not get the joke… you never know…]
--- NOT ALL GASES BURN ---
8 -- Mini Dry Ice Fire Extinguisher
An erlenmeyer flask is fitted with a rubber stopper and an L-shaped piece of glass tubing. Some finely-chopped dry ice is added to the flask and the escaping CO2 gas is used to put out a couple of candle flames. CO2 is shown to NOT support combustion.
9 -- Pouring CO2

[Dr. G. gets students to tell him that CO2 will be heavier than O2 or N2 in the air and that we have already demonstrated another property of CO2… it does not support combustion.]
This is a cool demonstration. Set up three large beakers (we use tall form 1-L beakers). The first contains some chunks of dry ice with a piece of cardboard on top to stop drafts. The last contains a low, lit votive candle. The second beaker is "empty" (full of air).
Show that pouring the "empty" beaker of air over the candle has no effect.
Carefully pour the CO2 from the first beaker into the "empty" beaker (it looks like you are pouring nothing). Now… pour the contents of the "empty" beaker over the candle… it will go out.
10 -- CO2 poured down a rain gutter
As a larger version of the previous demonstration, we have a series of votive candles stuck to a rain gutter… we light the candles and then pour CO2 from a cut off Sparklett's bottle down the rain gutter while standing on a ladder. The candles go out one by one as the CO2 flows down the gutter… I always have trouble getting the bottom candles to go out… but it looks very cool.
--- LIQUIDS THAT BURN ---
11 -- Methanol in a 5-gallon "Sparklett's bottle"
NOTE: Do this behind a safety shield. Use a fresh bottle each year since the heat causes the plastic to crystallize and get brittle.
A small amount of methanol is poured into a large water bottle. It is turned and shaken so the methanol can vaporize. The excess is poured out and the top is lit with a long fireplace match or an Aim-n-Flame. The flames that shoot out of the top and bounce up and down are impressive (and a little scary).
Students will ask you to do it again… you can add more methanol and try again, but it doesn't work or it just burns (and melts the bottle)… because you've used up the oxygen… one thing needed for burning. Blow into the bottle to cool it and add more oxygen.
12 -- Methanol Cannon lit with a Tesla Coil

A relatively small bottle (we use a large rubbing alcohol bottle) has a cork stopper in the top. Into the two sides of the bottle are placed large iron nails that ALMOST touch. A little methanol is added to the bottle and shaken to give it a chance to vaporize. A Tesla coil is touched to one of the nails… the spark jumps across the gap between the nails to ignite the fuel.
NOTE: I have been told that the nails can fly out… use a safety shield and make certain the nails are not pointed at anyone.
13 -- Cleaning Igor's Hanky in a 50/50 mixture of methanol and water.
The patter involves the idea that we use burning to do some of the chores around Grovenstein Labs… such as cleaning Igor's handkerchiefs… We soak the hanky in a 50/50 mixture of methanol and water… then light it in the bunsen burner flame. Get the students to tell you that the reason the cloth doesn't burn is that the water takes away the heat and to burn, you need fuel, oxidizer, and HEAT…
Have a bucket of water close by… the dripping hanky leaves burning alcohol on the table and the bowl of 50/50 mixture often catches on fire as well… be careful.
14 -- Flame tests of salts
Ba, Sr, Na, Ca, K, Li and Cu salts are doused in methanol in evaporating dishes duct-taped to a piece of wood.
15 -- Flame Tornado using lighting fluid on a cotton ball

A lazy susan is fitted with a tall tube of screen door screen. A cotton ball soaked with lighter fluid is placed in an evaporating dish duct-taped to the center of the lazy susan. The ball is ignited. When the lazy susan is spun relatively slowly (it doesn't seem to work as well if you spin it fast), the flame grows into a tall tornado. This was supposedly used for one of the special effects in Raiders of the Lost Ark when the Ark was opened by the Nazis. Lighter fluid makes a good fuel because it burns with a strong yellow flame.
--- SOLIDS THAT BURN ---
16 -- Iron Tongs do not burn, but Steel Wool balls DO (more surface area)
17 -- Iron Filings burn even BETTER!
(We keep the fine iron filings in a salt shaker.)
18 -- Mg ribbon burns (iron is not the only metal that burns)
NOTE: caution students to look around the room… not directly at the burning Mg since it gives off a lot of UV light that can sunburn the retina.
19 -- Lycopodium powder burns well (fine powder… lots of surface area)

This is Igor... Dr. G. is taking the picture!
NOTE: I have heard that non-dairy creamer works well here. You might need to microwave it to make certain it is very dry.
NOTE: We used to simply flick this through a flame with a spatula to get a large flame. We have also used a glass tube attached to a bulb to throw the powder through a flame. The latest version of this demonstration uses a three foot tall plastic tube of about 2.5 inches in diameter… (a visit to a plastic supplier was necessary) stands up on three L-braces used as legs and attached to the tube with a couple of large rubber bands. This tube apparatus is place on a pie pan with a candle at the bottom of the tube… when a teaspoonful of lycopodium powder is sprinkled into the top of the tube, a great flame shoots up through the tube!
20 -- Cotton ball burns in air (20% oxygen)
21 -- Cotton ball burns better in a jar of oxygen (90% oxygen)
We use a big pickle jar (1 gallon size?) with sand on the bottom to keep the glass from breaking. We have a tank of oxygen we use to fill the jar.
22 -- Gun cotton
Nitrocellulose has the oxidizer attached directly to the fibers… burns instantly!
We use a recipe found in the first demonstration book by Bassam Shakhashiri. It uses cotton balls soaked briefly in a mixture of concentrated nitric acid and concentration sulfuric acid. The cotton is neutralized in baking soda and allowed to dry COMPLETELY! This must be made AT LEAST two days in advance…preferably a few days in advance so it can be tested.
--- FINALE ---
23 -- Chemiluminescence
in a funnel with clear Tygon tubing spiraling down to a waste jug.
We've seen many reactions that give off energy as light and heat. Here is a reaction that gives off light, but not heat! Again, we use the demonstration from the Shakhashiri book.
References:
Shakhashiri, B.Z. "Chemical Demonstrations Volume 1--A Handbook for Teachers of Chemistry"; The University of Wisconsin Press: Madison, Wisconsin, 1983
Shannon Luminescent Products, Santa Ana, CA (714) 550-9931